Tutorial: First Steps on Mixing
First steps in mixing
1. Import files
Important:
Make sure that you have theFiles in the project foldercopied and, above all, where to find it, because order is half the battle.Convert and copyThis is because the files should be adapted to your project settings - which you have hopefully made - not the other way around.
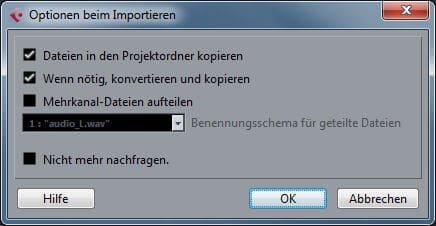 File import Cubase 7
2. Name files correctly / sort files (create folders)
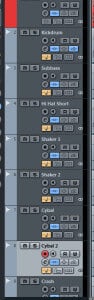 Label files correctly
 In order not to lose track of larger projects, you have to have yourFiles right to name. You can z. B. choose the following names:Hi-hat 1, hi-hat 2, sub-bass, synth-bass,etc .. I would suggestthe sorting of the tracksto make it so that youall instruments of a category (Drums, synths, vocals) sorted by. Alternatively, you canin the track names your panorama settingto include (Hi-Hat Left, Hi-Hat Right, Vocals Middle, etc.). Just attracks of the same nameso you keep theOverview. Just create a few folders and name them accordingly. You can rest assured some for yourVocals, backings, drums, EFXcreate etc.
3. Create overviews in the digital mixer / routing to groups and output channels
The best way to get an overview is to create folders forDrums, Synthis, Samples, Backing Vocals, Main Vocals, Efx, etc.. createand then inMove top folder, e.g.Drums, vocals. Just like I have named my subfolders and top folders, theGroup lanes as well as thoseOutput channelslabeled. So you can always understand whichTrack whereheard where shecome hereandwhere it leads.
4. Leveling the instruments or tracks / distributing them in the panorama
In principle there is here no "hard rule"However, you should avoid “Sea” level, otherwise it will lead to “overs“ (digital override / Clipping) can occur. If you set the level to “quiet“, it can happen that the Distance between recording signalandSelf-noisethe device is so extremely reduced that you will have problems later processing because theSignal component an static noise about the realRecording signallays. Here one speaks ofSignal-to-noise ratio. This point is addressed here in the tutorial, as it is important to create the right conditions for the mix and post-processing while recording.
5. Order of inserts / bouncing of the mixdown
I will explain all of them, and especially the last two points, using oneApplication examplehere inYoutube tutorial Video. Since the possibilities in the individual sequences are quite different, there is no short description here.
You are currently viewing placeholder content fromYouTube. To access the actual content, click the button below. Please note that data will be passed on to third parties.
More information